Charger control
Charger control is opt-in and off by default. Turn it on with the Allow Control setting on the hardware page (see Settings) if you want to change the zappi's charge mode, start or cancel a boost, or change the Eco+ minimum green percentage from Domoticz.
Read this before you enable it
Turning Allow Control on makes the control devices below writable in Domoticz, and lets the plugin send commands to your charger. The plugin itself has no separate per-user permission; use Domoticz's own per-user device access controls to limit which Domoticz users can see and operate these devices. See Security.
When the control devices appear
- With Allow Control off, none of the control devices below exist, and the plugin sends no commands to myenergi under any circumstance.
- Turning Allow Control on and saving the hardware settings restarts the plugin, which creates and shows the control devices right away, without waiting for the next scheduled poll.
- Turning Allow Control off again hides the control devices (they are not deleted, so their last values are preserved) and, as a one-time step, re-shows the Zappi Mode text device (unit 7), which is otherwise hidden while control is on since Charge Mode duplicates it.
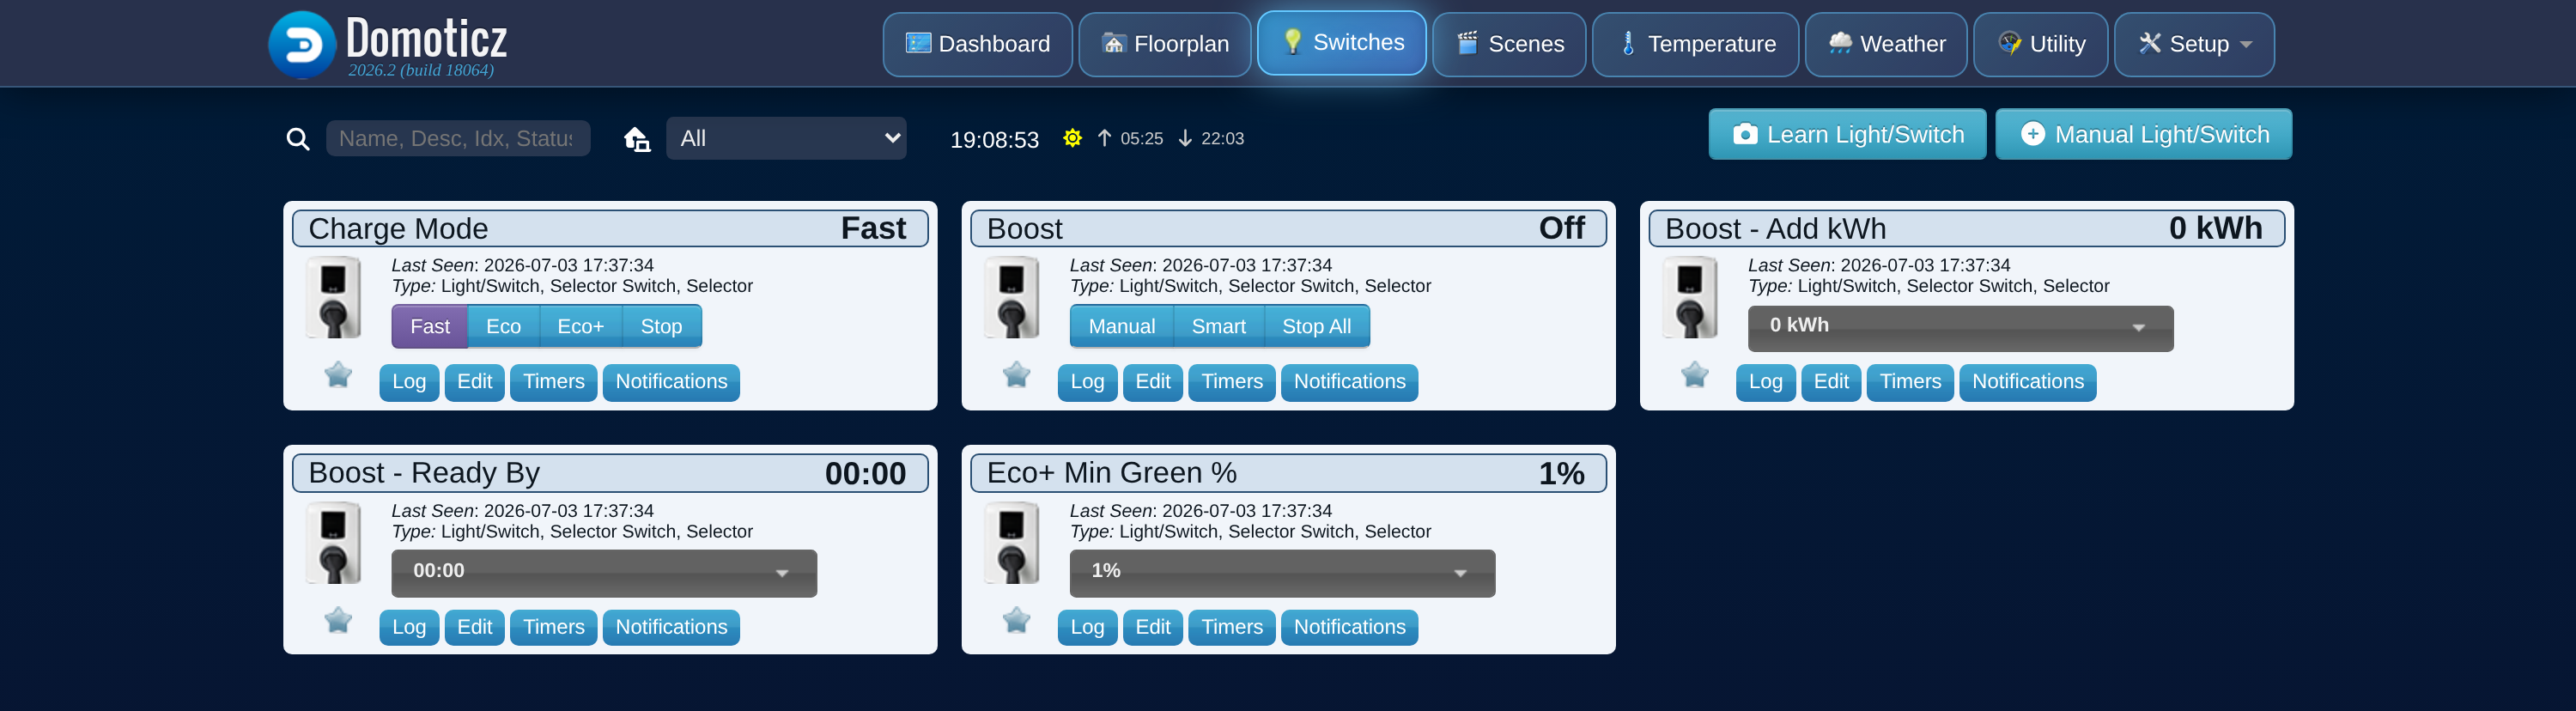
Control devices (units 12-18)
| Unit | Device name | Domoticz type | Style | What it does |
|---|---|---|---|---|
| 12 | Charge Mode | Selector Switch | Buttons | Sets the zappi's mode: Fast, Eco, Eco+, or Stop. Writes immediately when you press a button. |
| 13 | Boost | Selector Switch | Buttons | Starts or cancels a boost: Manual, Smart, or Stop All. See Starting a boost below; it uses the two devices below as its inputs. |
| 14 | Boost - Add kWh | Selector Switch | Dropdown | Sets the amount to add on the next boost: 0, 5, 10, 20, 40, 60, 80, or 99 kWh. |
| 15 | Boost - Ready By | Selector Switch | Dropdown | Sets the target completion time for a Smart boost, on the hour from 00:00 to 23:00. Ignored by a Manual boost. |
| 16 | Eco+ Min Green % | Selector Switch | Dropdown | Sets the Eco+ minimum green-energy percentage: 1, 10, 20, ... up to 100%. Writes immediately when changed. |
| 18 | Charger Lock State | Text | Read-only | Shows the zappi's current lock flags (see Reading the lock state). Cannot be set from Domoticz. |
All selectors hide their "Off" position, so you will only ever see the meaningful choices listed above.
Starting a boost
Boost - Add kWh and Boost - Ready By do not talk to myenergi by themselves: choosing a value in either one just remembers it locally, ready for the next time you press a button on the Boost selector.
- Set Boost - Add kWh to the amount of energy you want added. A value of 0 kWh means no boost will actually start; pick a nonzero amount first.
- If you plan to use Smart, also set Boost - Ready By to the time you want charging to finish.
- Press Manual or Smart on the Boost selector:
- Manual starts an immediate boost for the kWh amount you set, ignoring Ready By.
- Smart schedules a boost that aims to finish by the Ready By time, spreading the charge to use as much solar as possible.
- Press Stop All on the Boost selector at any time to cancel an active boost.
The Boost selector's position always reflects what the zappi is actually doing (Manual, Smart, or neither), so it re-syncs to the real state on the next poll even if you never touch it directly.
Reading the lock state
Charger Lock State decodes the zappi's lock flags into plain text, for example:
The possible flags are: Locked Now, EV Plugged, EV Unplugged, Charge, and
Charge session allowed. If none apply, the device shows (none). This device is read-only;
there is no supported way to change the physical lock state from Domoticz.
Pressing a button twice in a row does nothing extra
If you press the same button again within about 3 seconds, the plugin ignores the second press, and it always leaves a short gap between any two commands it sends. This keeps it from sending myenergi's cloud a burst of requests. If a command seems to have had no effect, wait a few seconds and check the device's state before trying again.
See also
- Settings for the Allow Control switch.
- Monitoring devices for the always-on, read-only devices (units 1-11).
- Security for what the API key can do and how to protect it.